
Snowflake external functions, Part 1 – Hello World tutorial for triggering AWS Lambda
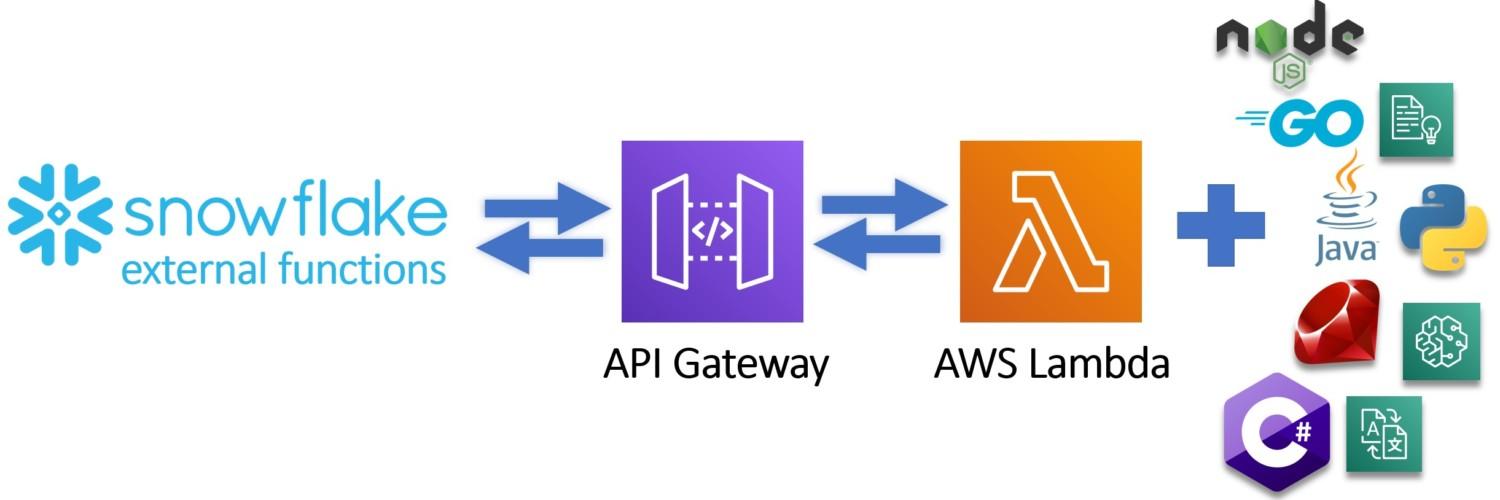
External functions are new functionality published by Snowflake and already available for all accounts as a preview feature. With external functions, it is now possible to trigger for example Python, C#, Node.js code or native cloud services as part of your data pipeline using simple SQL.
I will publish two blog posts explaining what external functions are in Snowflake, show how to trigger basic Hello World Python code in AWS Lambda with the result showing in Snowflake and finally show how you can trigger Amazon services like Translate and Comprehend using external functions and enable concrete use cases for external functions.
In this first blog post, I will focus on the showing on how you can set up your first external function and trigger Python code which echoes your input result back to Snowflake.
What external functions are?
At the simplest form, external functions are scalar functions which return values based on the input. Under the hood, they are much more. Compared to traditional scalar SQL function where you are limited using SQL, external functions open up the possibility to use for example Python, C# or Go as part of your data pipelines. You can also leverage third-party services and call for example Amazon services if they support the set requirements. To pass the requirements, the external function must be able to accept JSON payload and return JSON output. The external function must also be accessed through HTTPS endpoint.
Example – How to trigger AWS Lambda -function
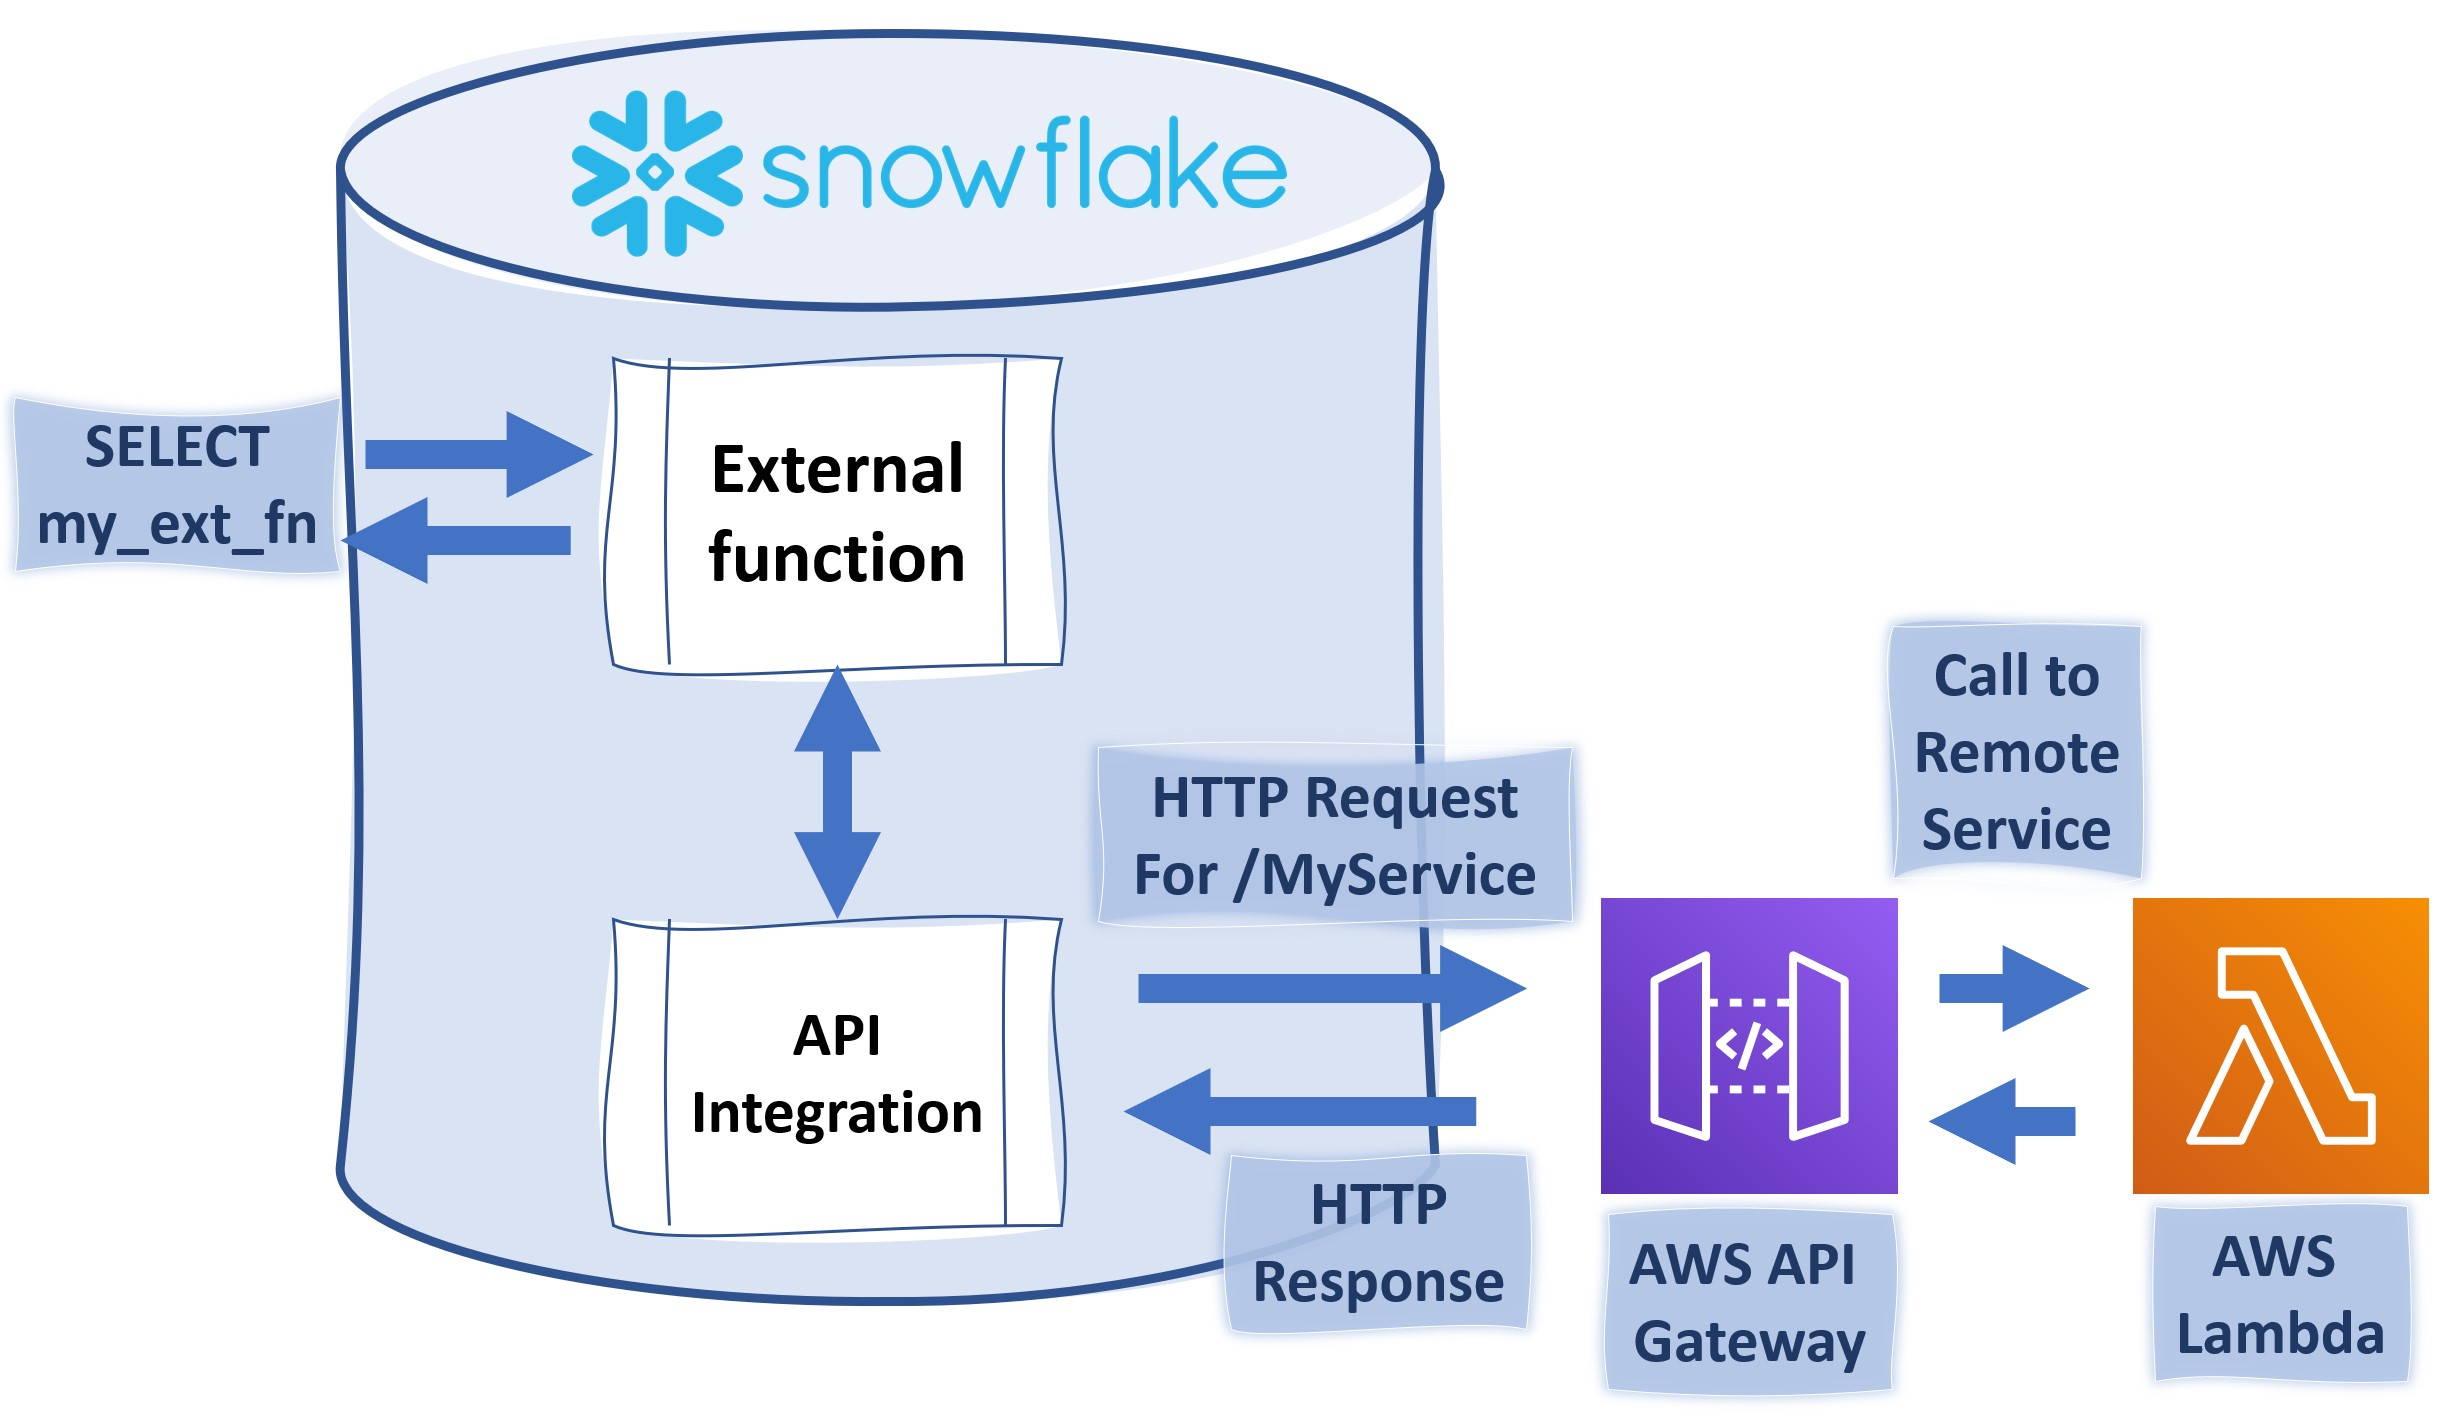
This example follows instructions from Snowflake site and shows you in more detail on how you can trigger Python code running on AWS Lambda using external functions like illustrated below.
To complete this example, you will need to have AWS account where you have the necessary rights to create AWS IAM (Identity and Access Management) roles, API Gateway endpoints and Lambda -functions. You will need also a Snowflake ACCOUNTADMIN -privileges or role which has CREATE INTEGRATION rights.
These instructions consist of the following chapters.
- Creating a remote service (Lambda Function on AWS)
- Creating an IAM role for Snowflake use
- Creating a proxy service on AWS API Gateway.
- Securing AWS API Gateway Proxy
- Creating an API Integration in Snowflake.
- Setting up trust between Snowflake and IAM role
- Creating an external function in Snowflake.
- Calling the external function.
These instructions are written for a person who has some AWS knowledge as the instructions will not explain the use of services. We will use the same template as the Snowflake instruction to record authentication-related information. Having already done a few external function integrations, I highly recommend using this template.
Cloud Platform (IAM) Account Id: _____________________________________________
Lambda Function Name...........: _____________________________________________
New IAM Role Name..............: _____________________________________________
Cloud Platform (IAM) Role ARN..: _____________________________________________
Proxy Service Resource Name....: _____________________________________________
Resource Invocation URL........: _____________________________________________
Method Request ARN.............: _____________________________________________
API_AWS_IAM_USER_ARN...........: _____________________________________________
API_AWS_EXTERNAL_ID............: _____________________________________________
Creating a remote service (Lambda Function on AWS)
Before we create Lambda function we will need to obtain our AWS platform id. The easiest way to do this is to open AWS console and open “Support Center” under “Support” on the far right.
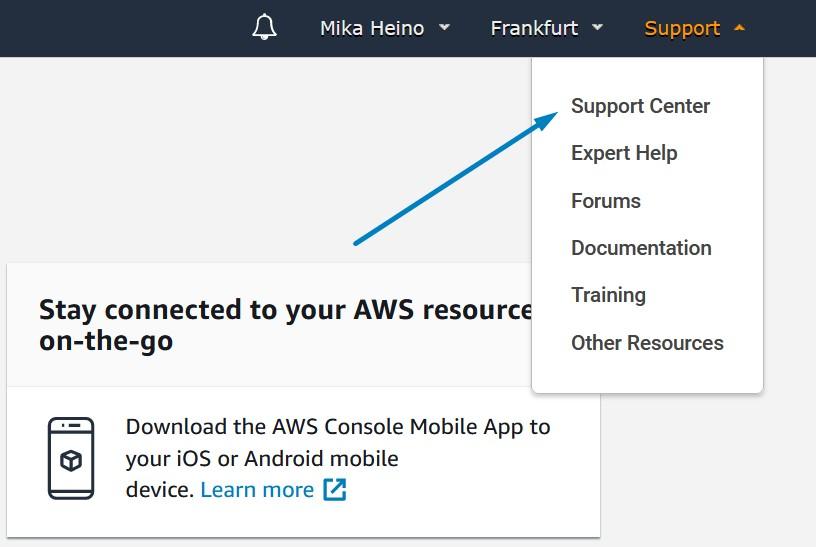
This will open a new window which will show your AWS platform id.
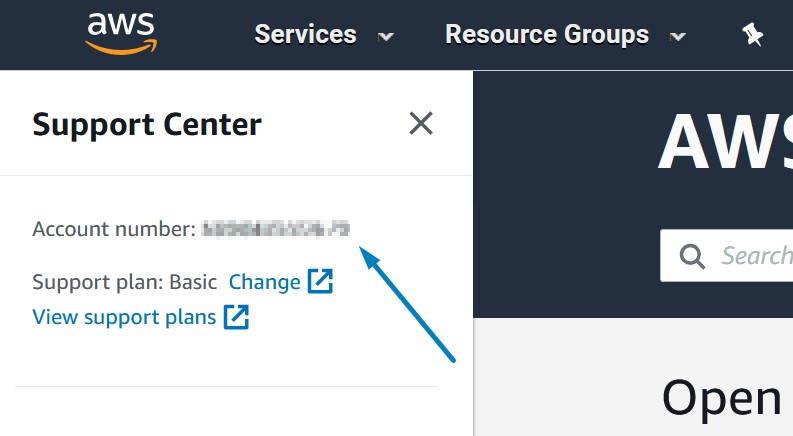
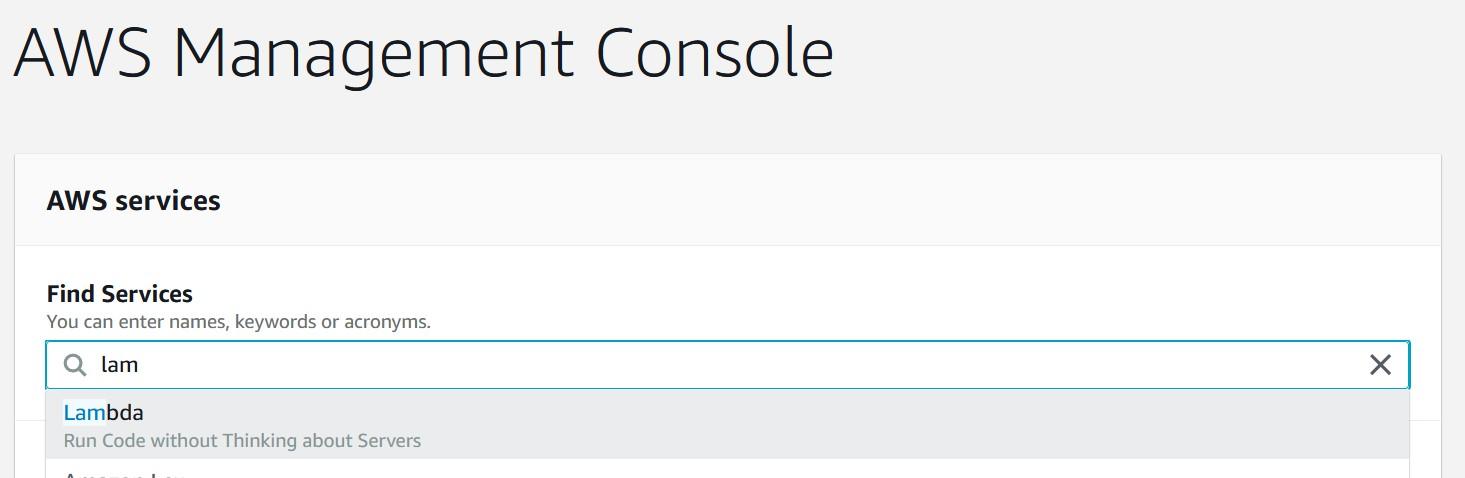
Record this 12-digit number into template shared previously. Now we will create a basic Lambda -function for our use. From the main console search Lambda
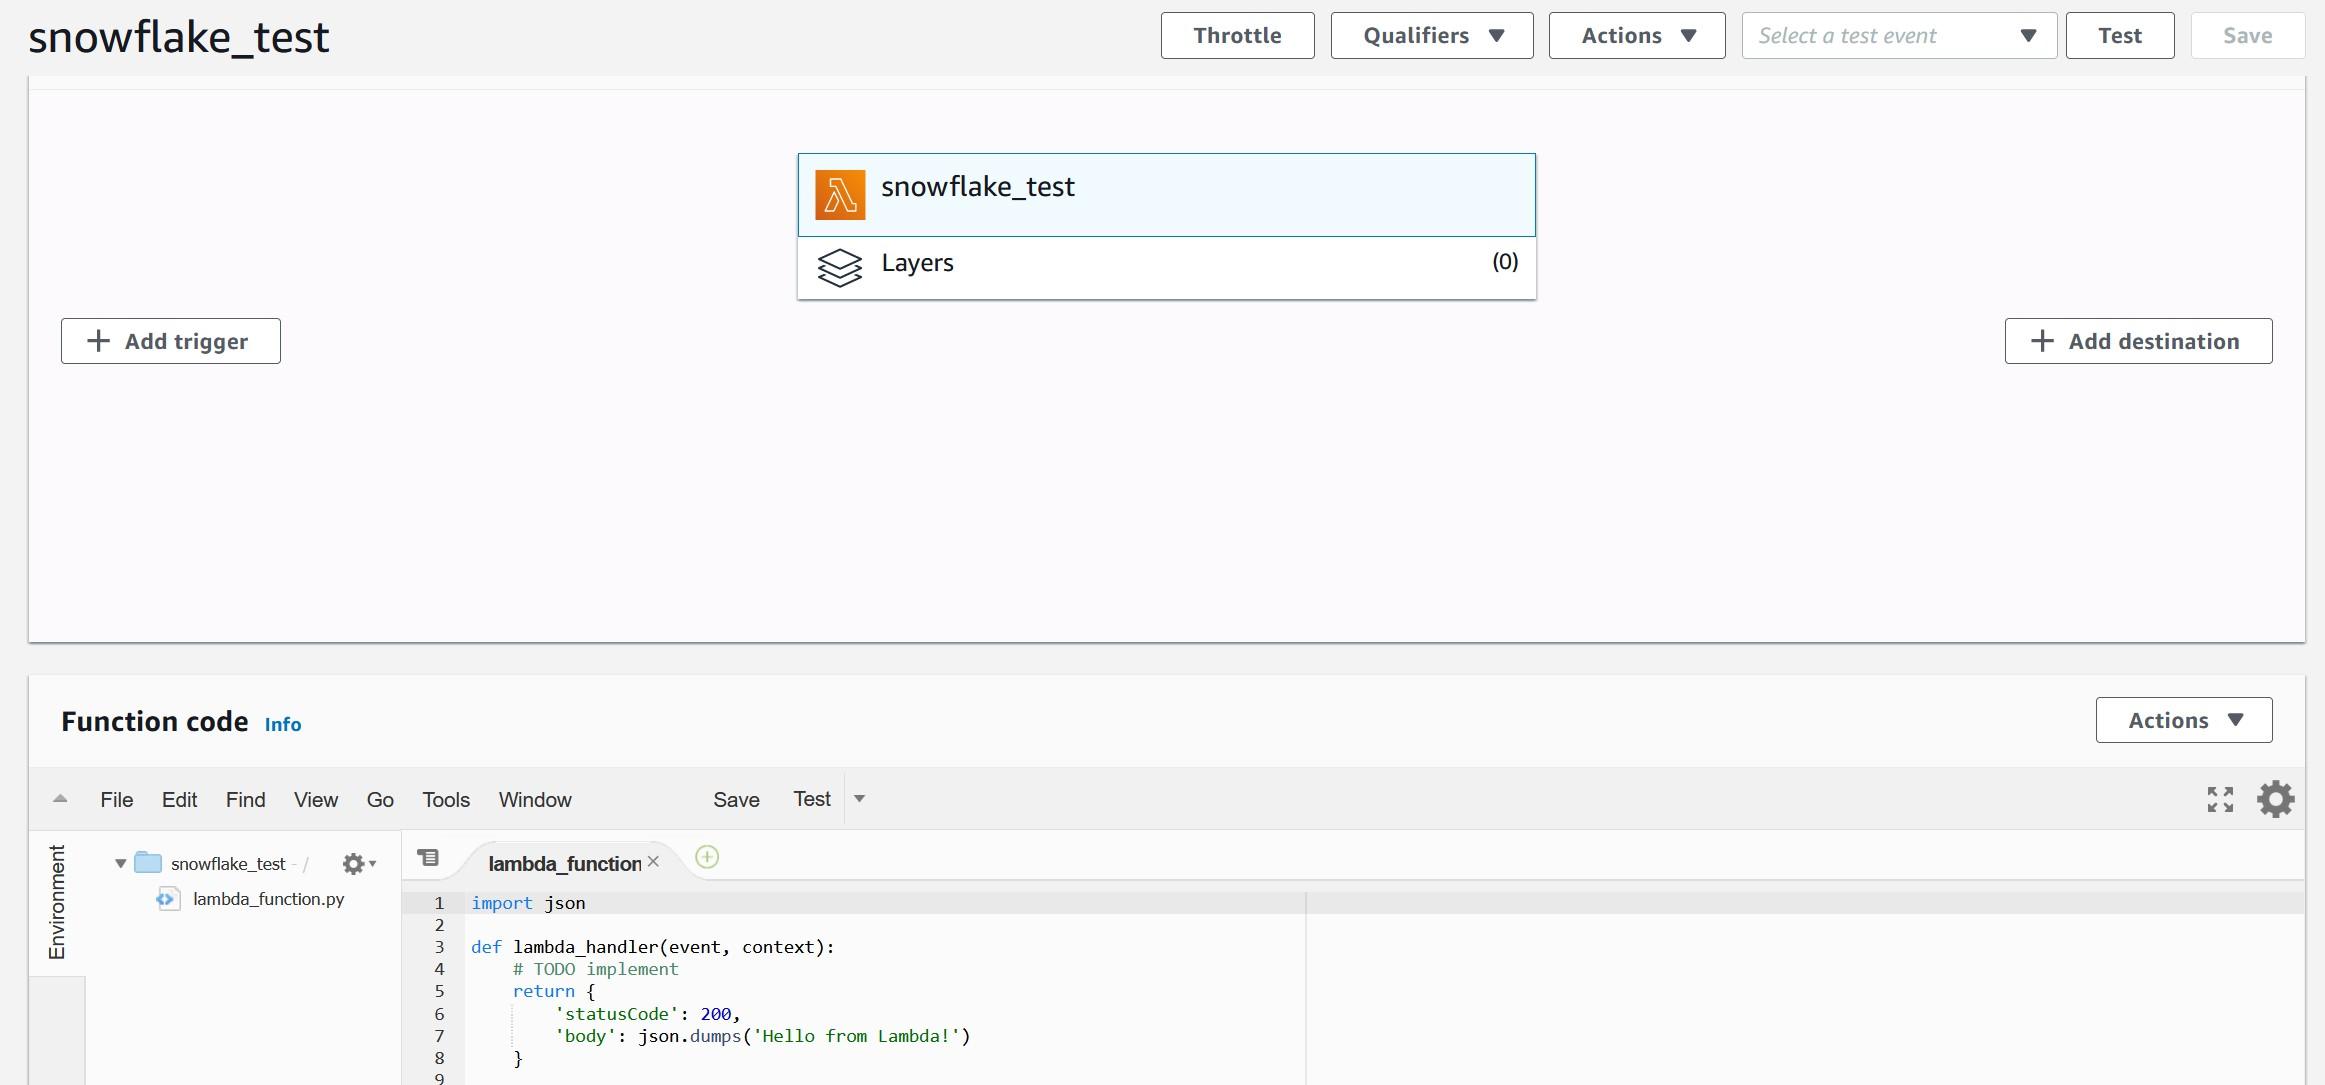
Once you have started Lambda, create a new function called snowflake_test using Python 3.7 runtime. For the execution role, select the option where you create a new role with basic Lambda permissions.

After pressing the “Create function” button, you should be greeted with the following view where you can paste the example code. The example code will echo the input provided and add text to confirm that the Snowflake to AWS connection is working. You can consider this as a Hello World -type of example which can be leveraged later on.
Copy-paste following Python code from my Github account into Function code view. We can test the Python code with following test data which should create following end result:

After testing the Lambda function we can move into creating an IAM role which is going to be used by Snowflake.
Creating an IAM role for Snowflake use
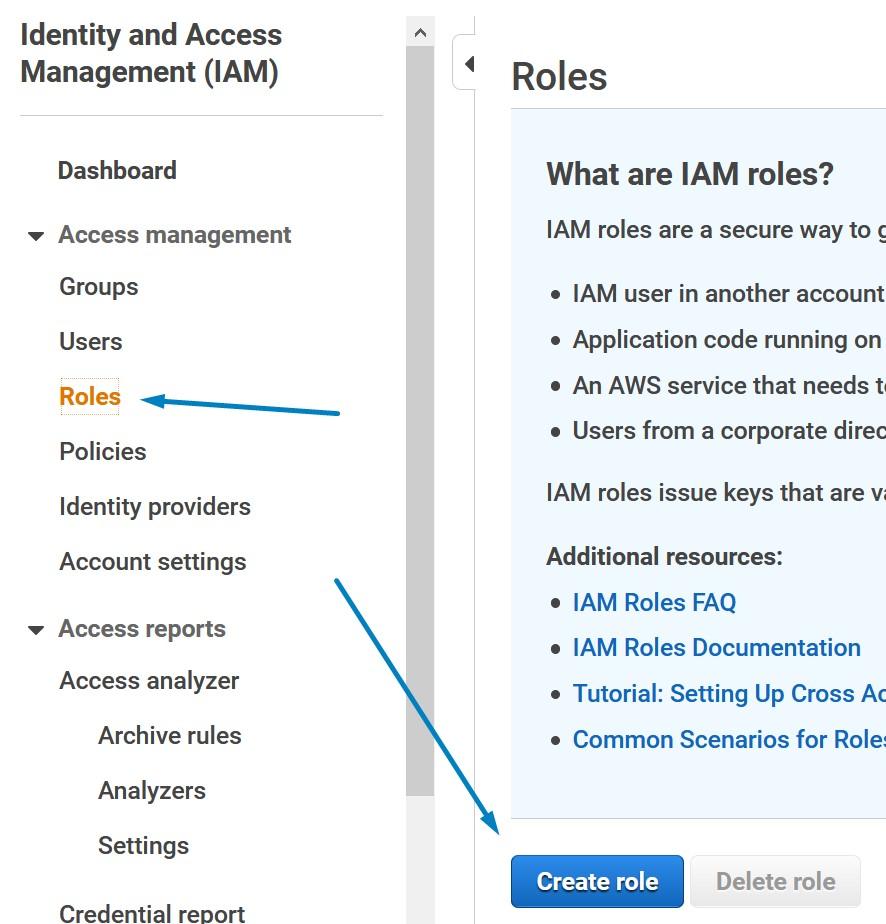
Creating an IAM role for Snowflake use is a straight forward job. Open up the Identity and Access Management (IAM) console and select “Roles” from right and press “Create role”.
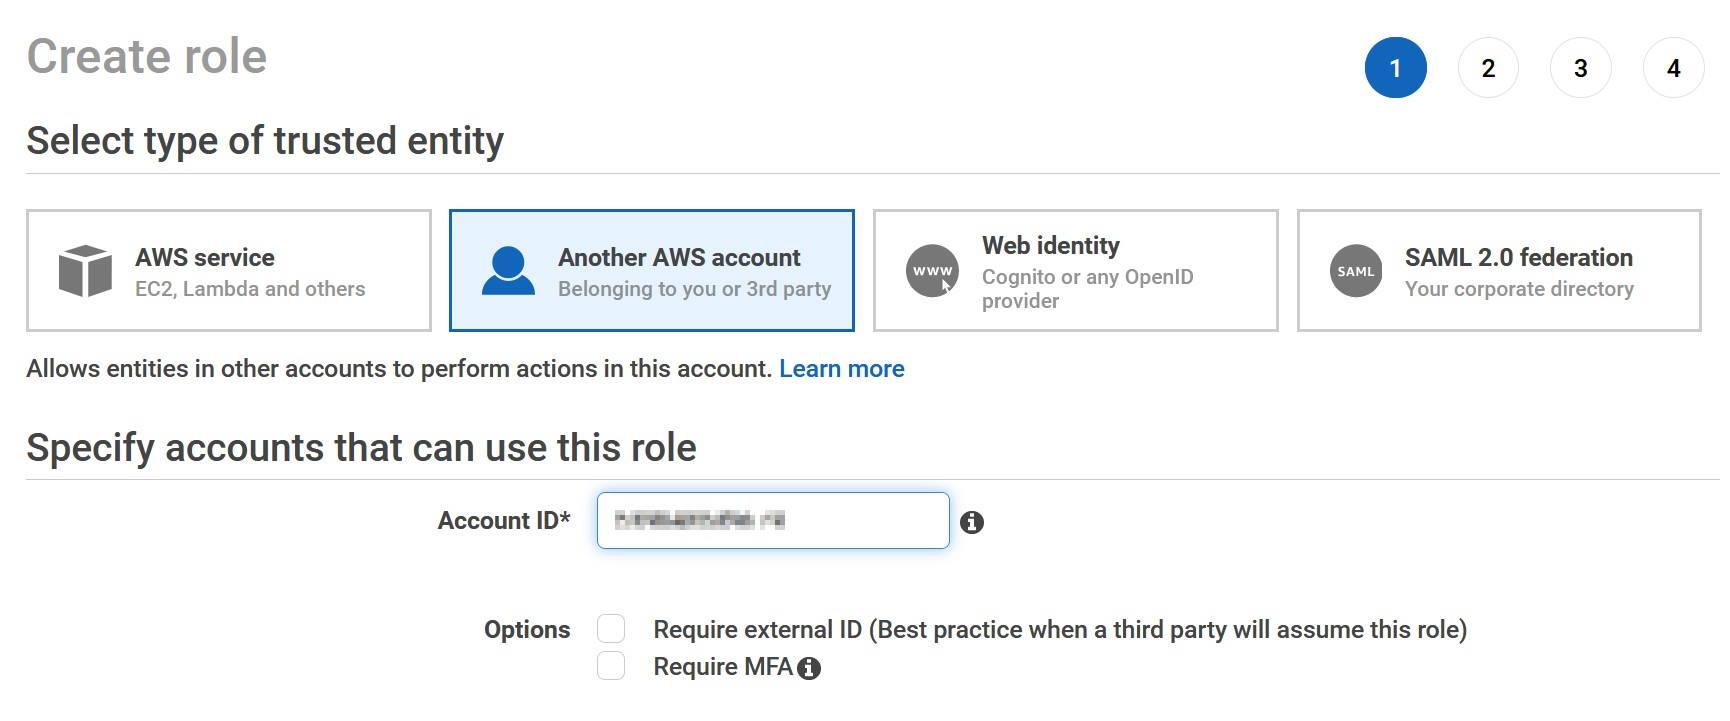
You should be greeted with a new view where you can define which kind of role you want to create. Create a role which has Another AWS account as a trusted entity. In the box for Account ID, give the same account id which was recorded earlier in the instructions.
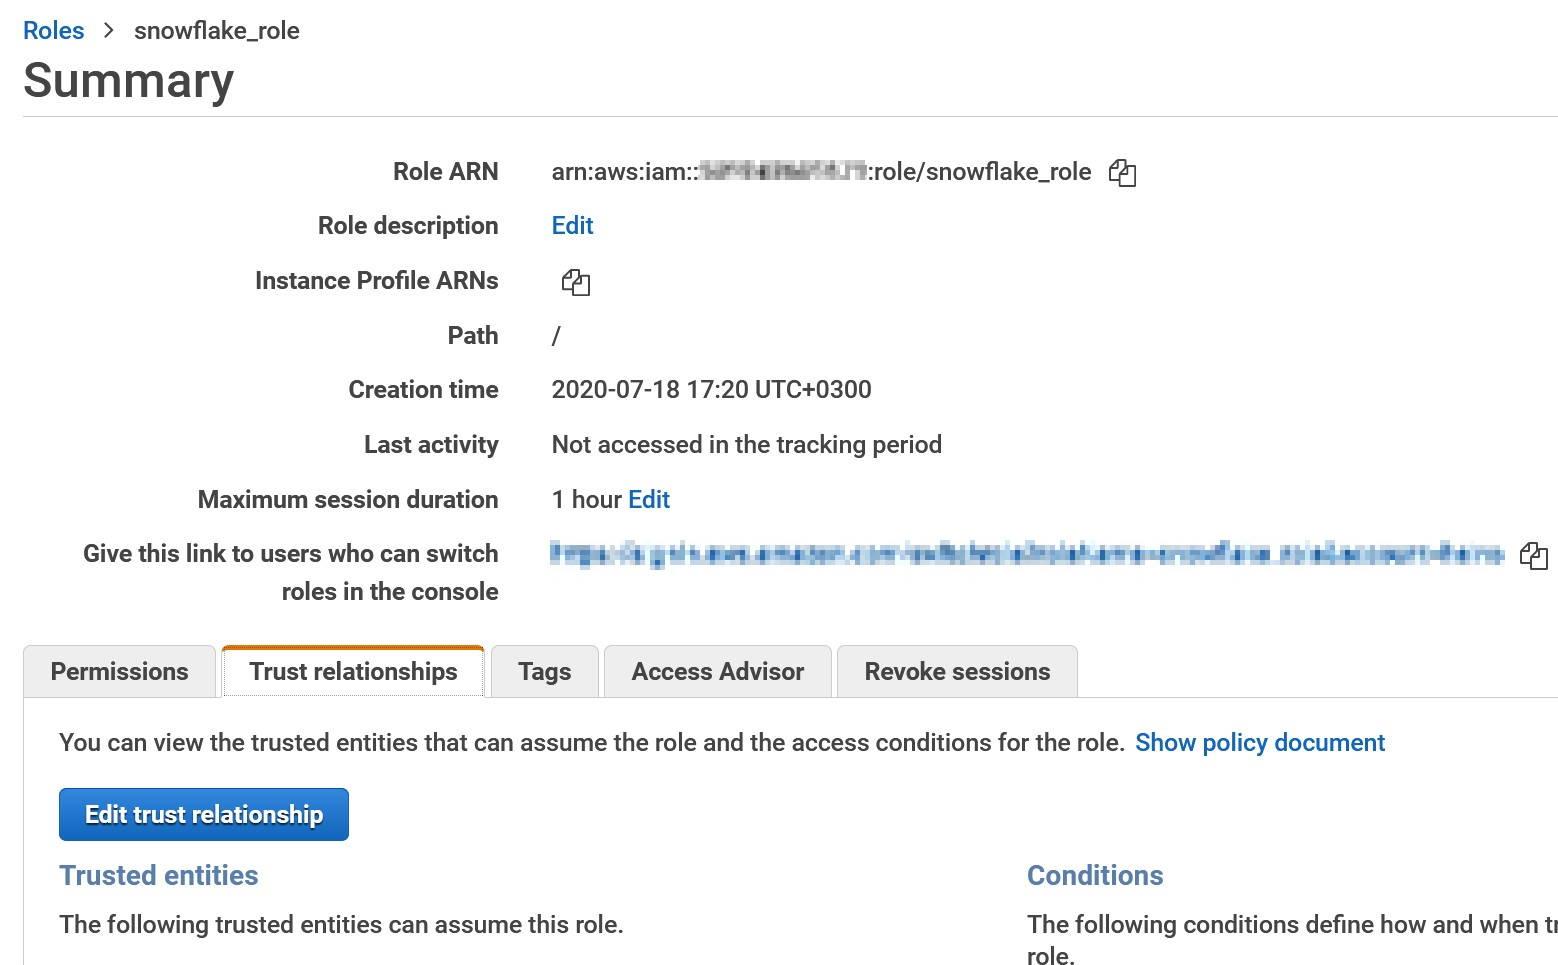
Name the new role as snowflake_role and record the role name into the template. Record also the role ARN.

Creating a proxy service on AWS API Gateway
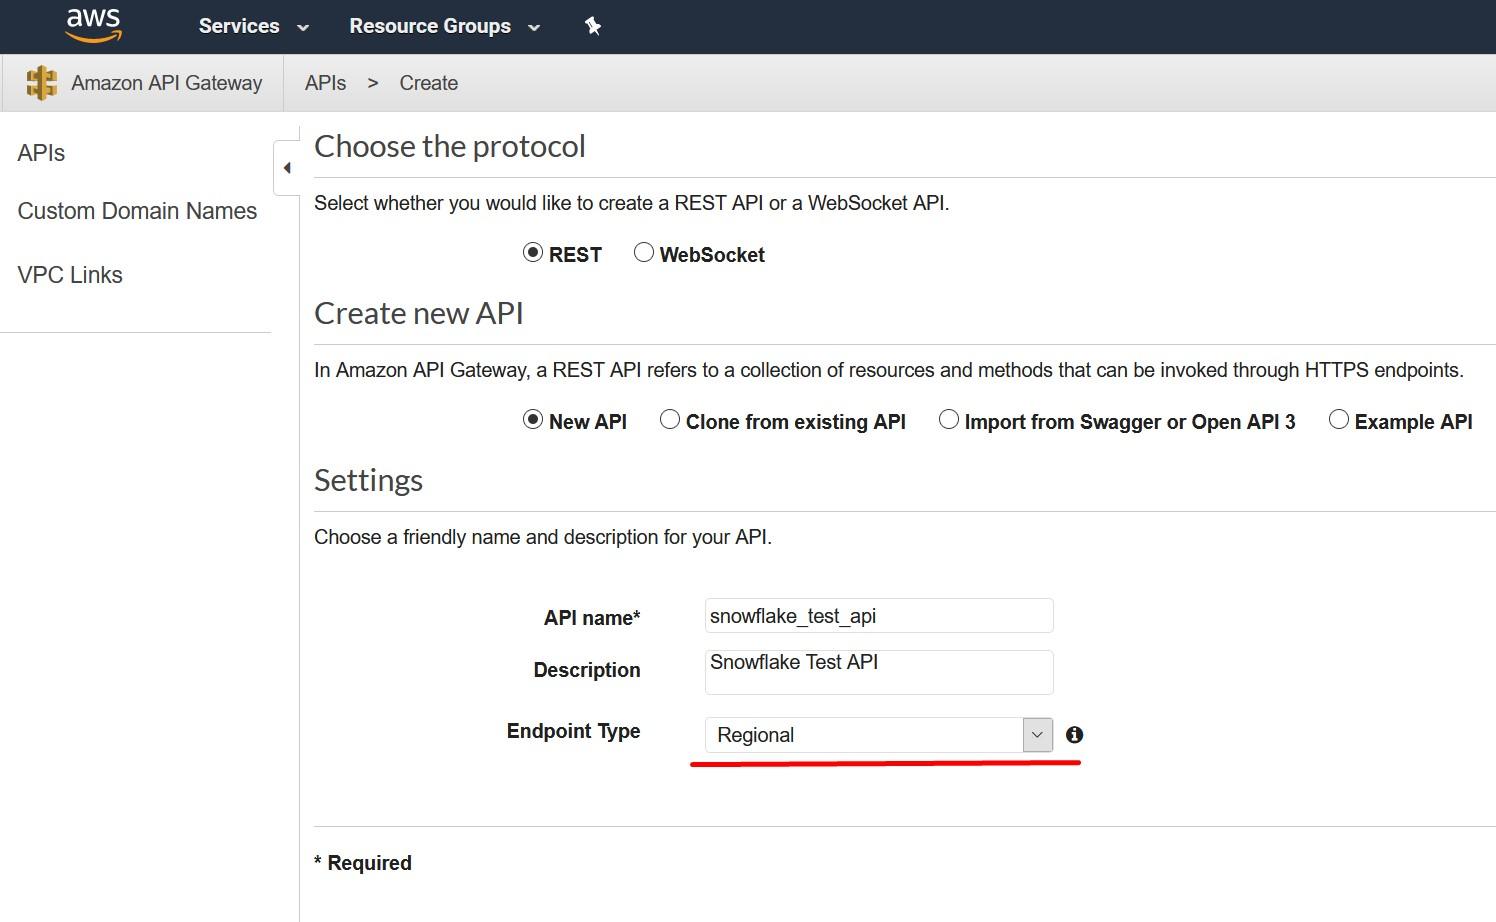
Create an API Gateway endpoint to be used. Snowflake will use this API endpoint to contact the Lambda -service which we created earlier. To create this, choose API Gateway service from the AWS console and select “Create API”. Call this new API snowflake_test_api and remember to select “Regional” as the endpoint type as currently, they are the only supported type.
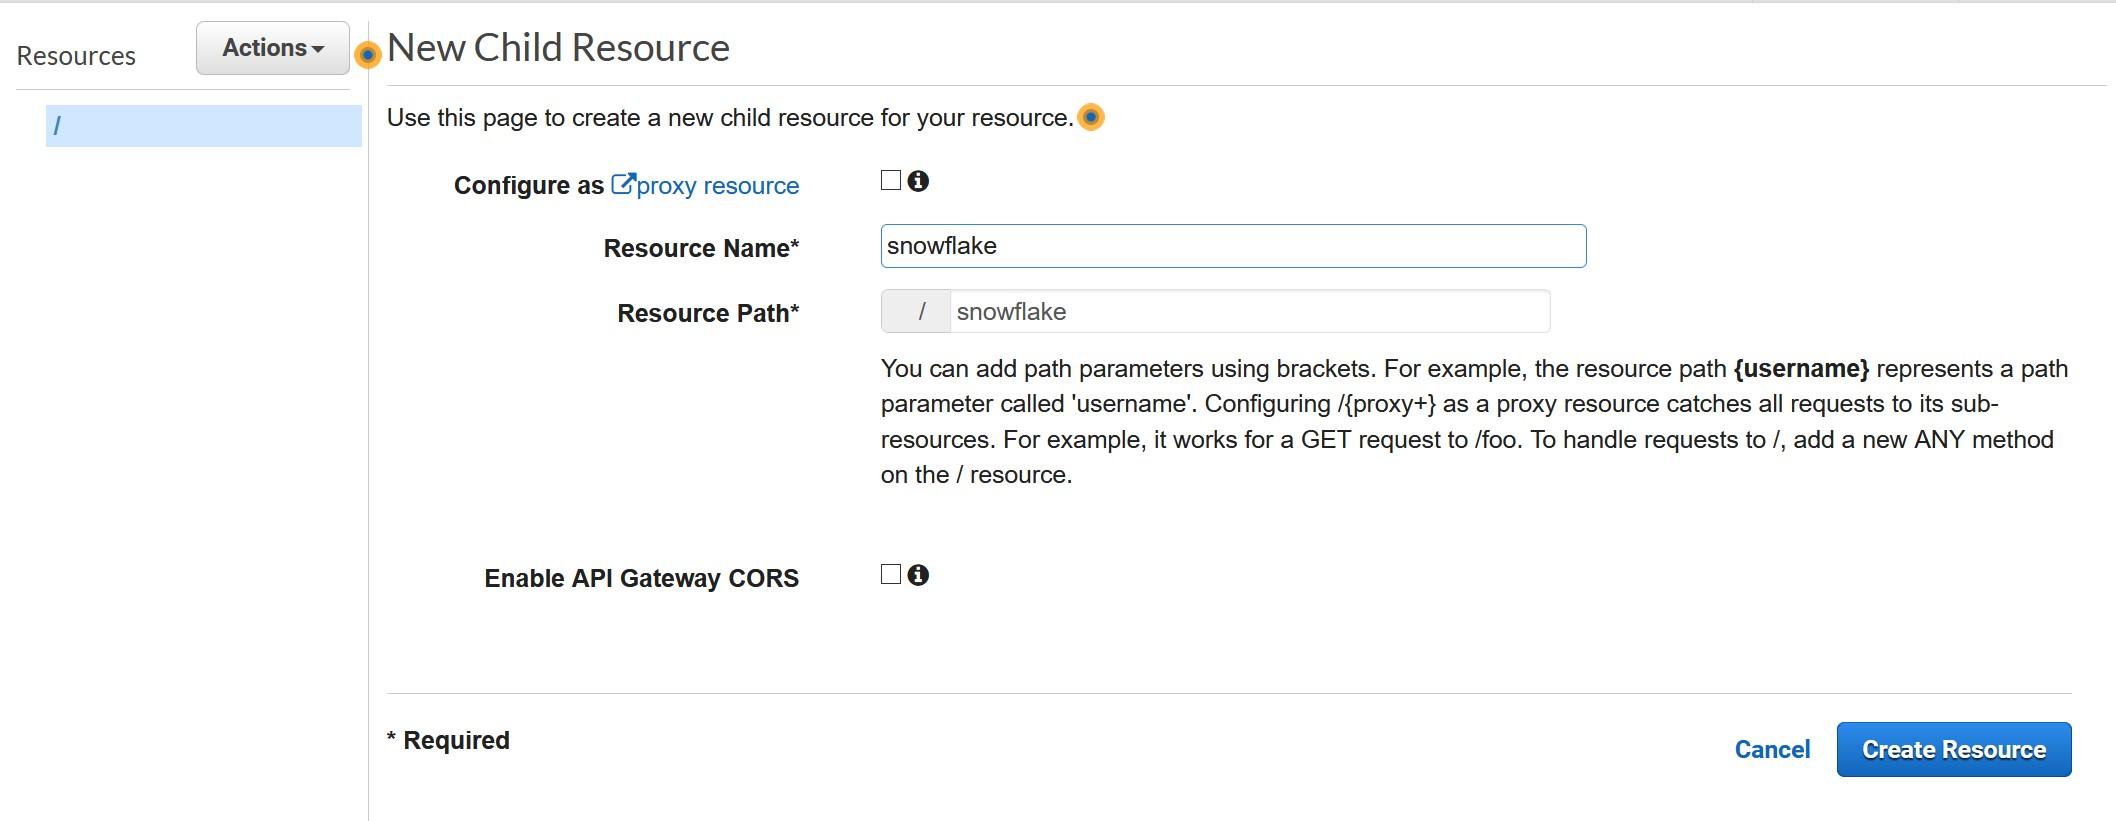
Create a Resource for the new API. Call the resource snowflake and record the same to the template as Proxy Service Resource Name.
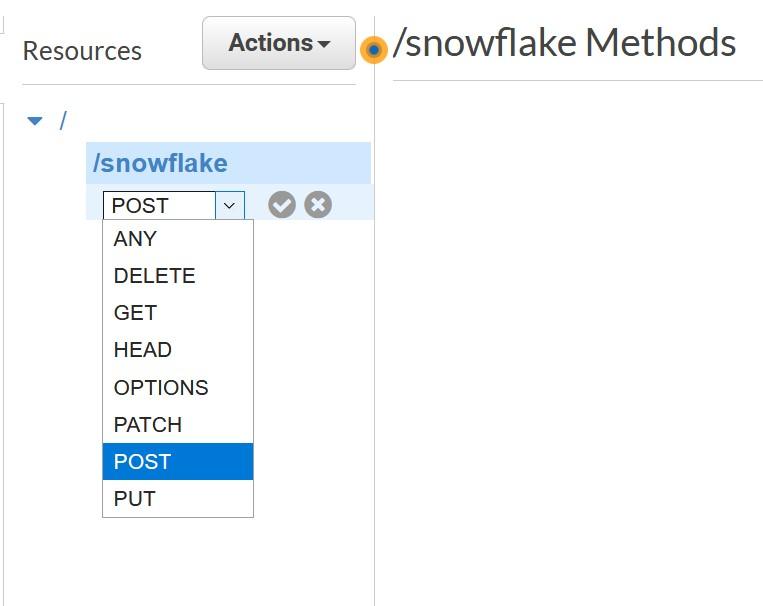
Create Method for the new API from the “Actions” menu, choose POST and press grey checkmark to create.
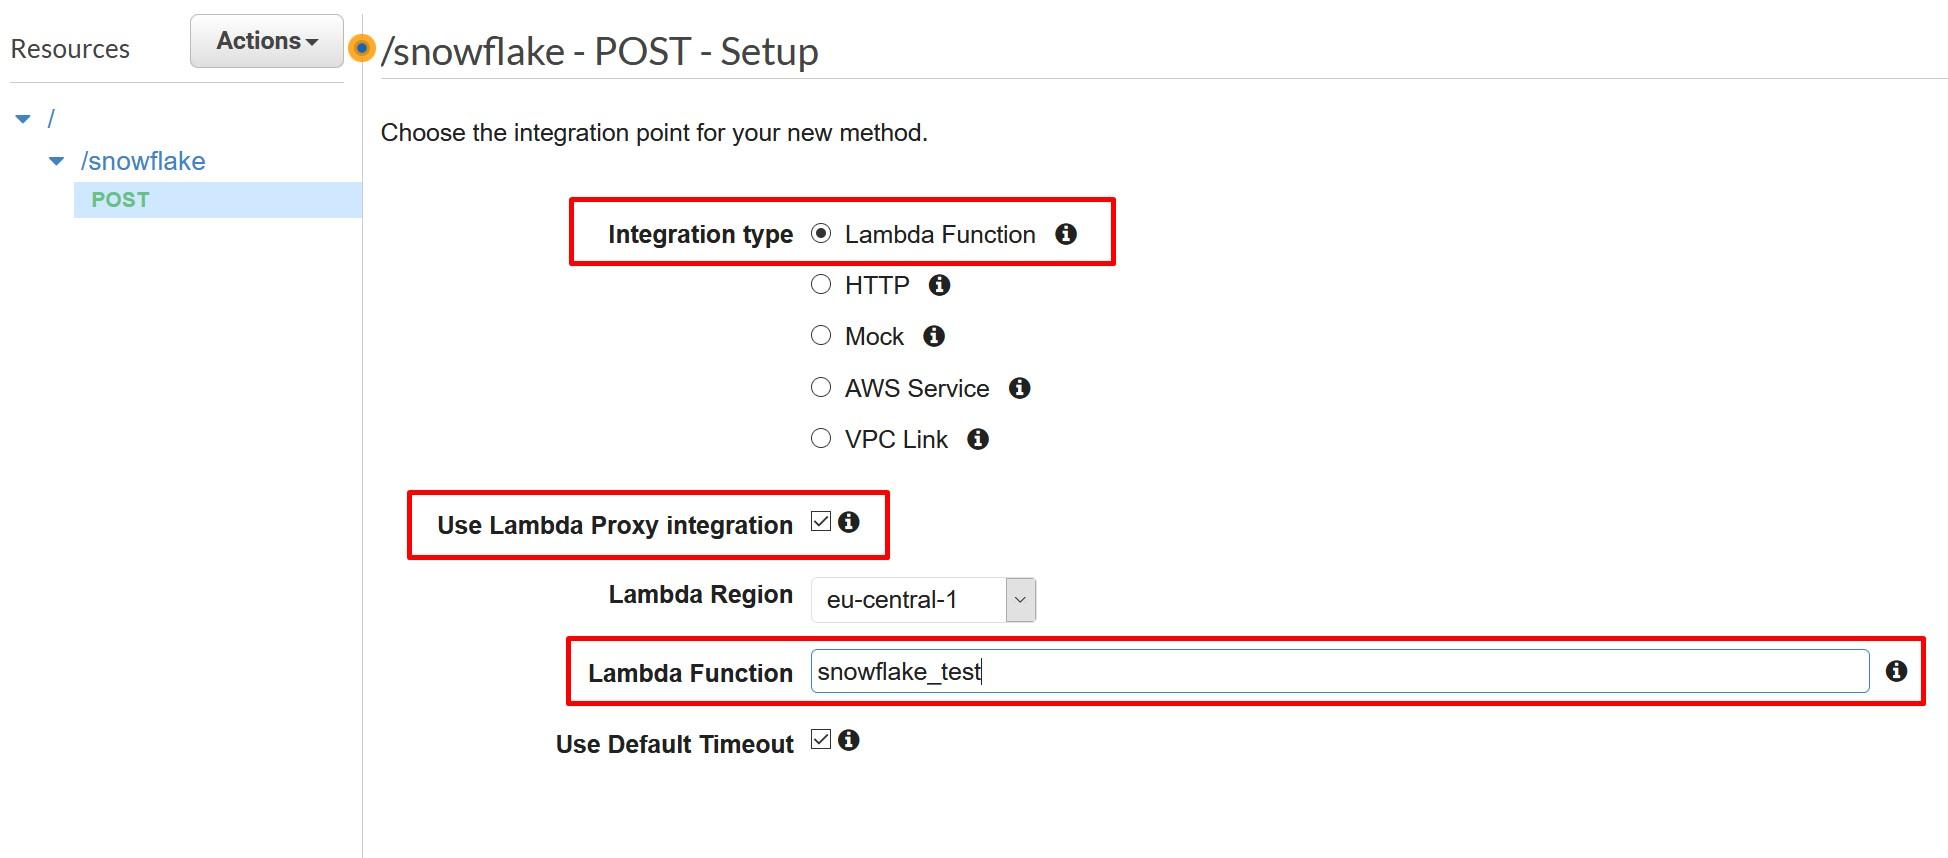
During the creation choose Lambda Function as Integration type and select “Use Lambda Proxy Integration”. Finally, choose the Lambda function created earlier.
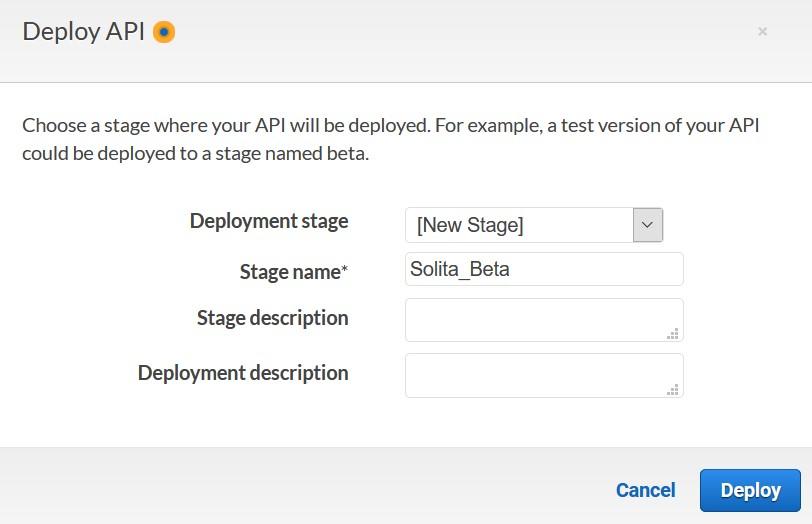
Save your API and deploy your API to a stage.
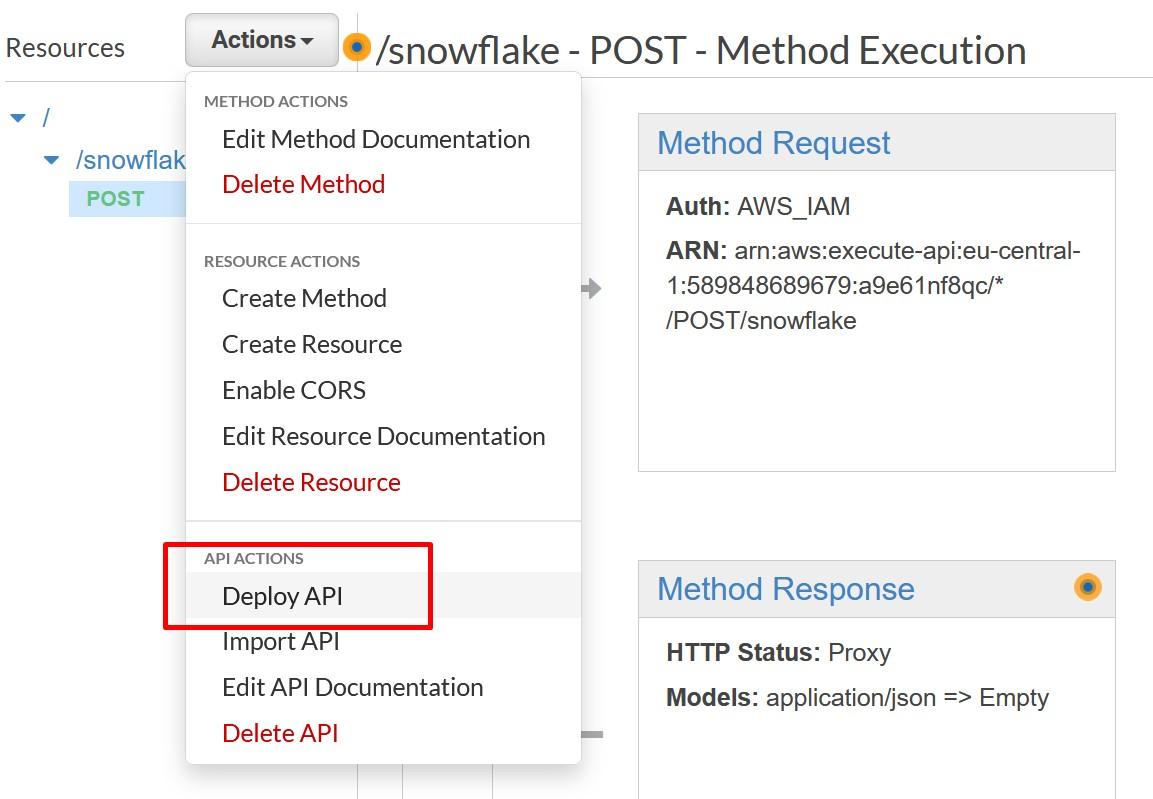
Creating a new stage can be done at the same time as the deploy happens.
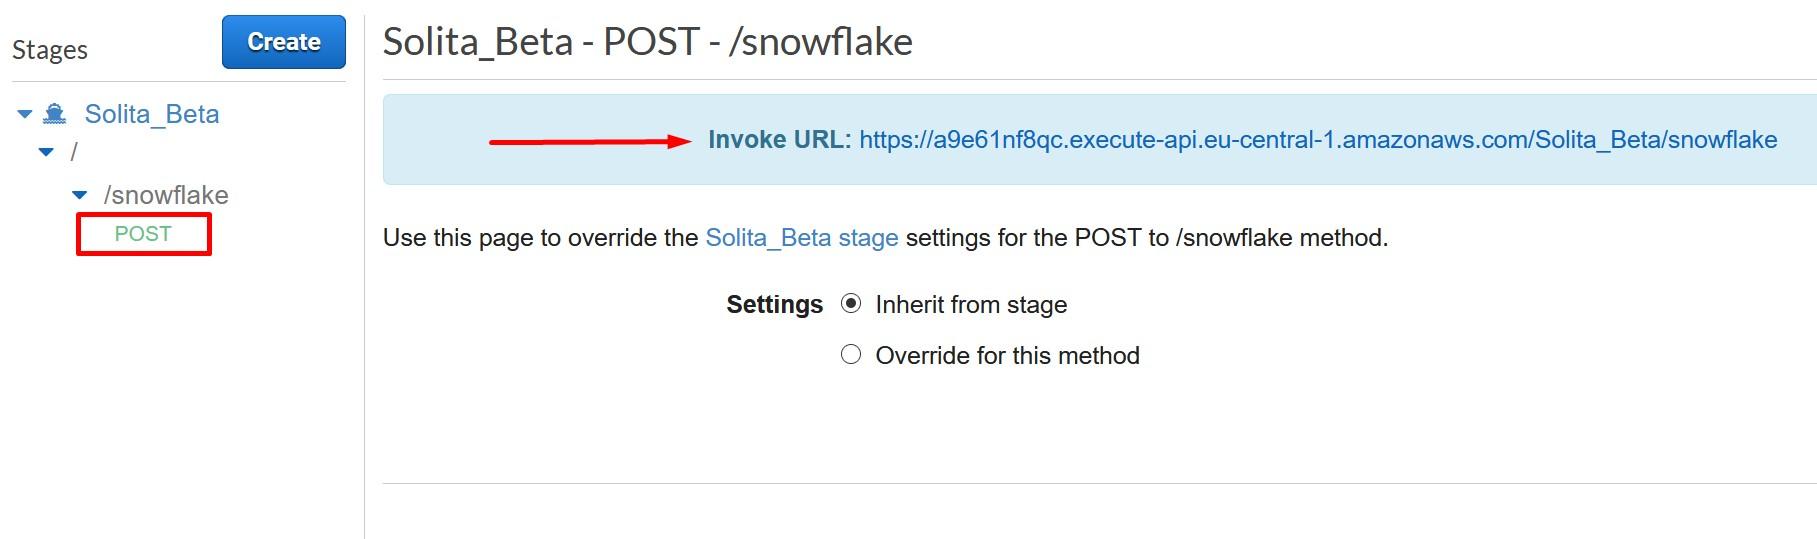
Once deployed, record the Invoke URL from POST.
Now were done creating the API Gateway. Next step is to secure the API Gateway that only your Snowflake account can access it.
Securing AWS API Gateway Proxy
In the API Gateway console, go to your API method and choose Method Request.
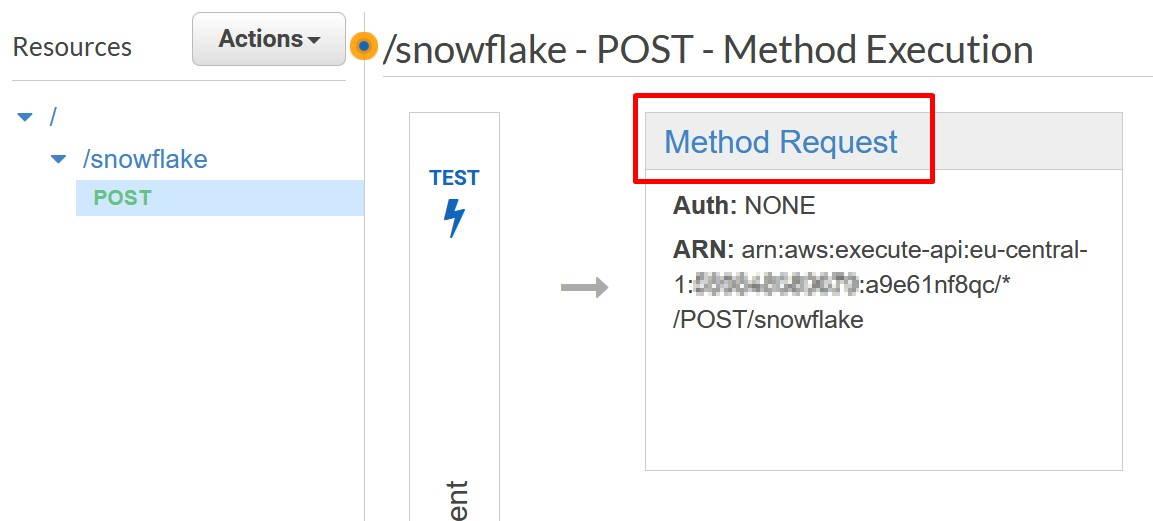
Inside Method Request, choose “AWS_IAM” as the Authorization mode.
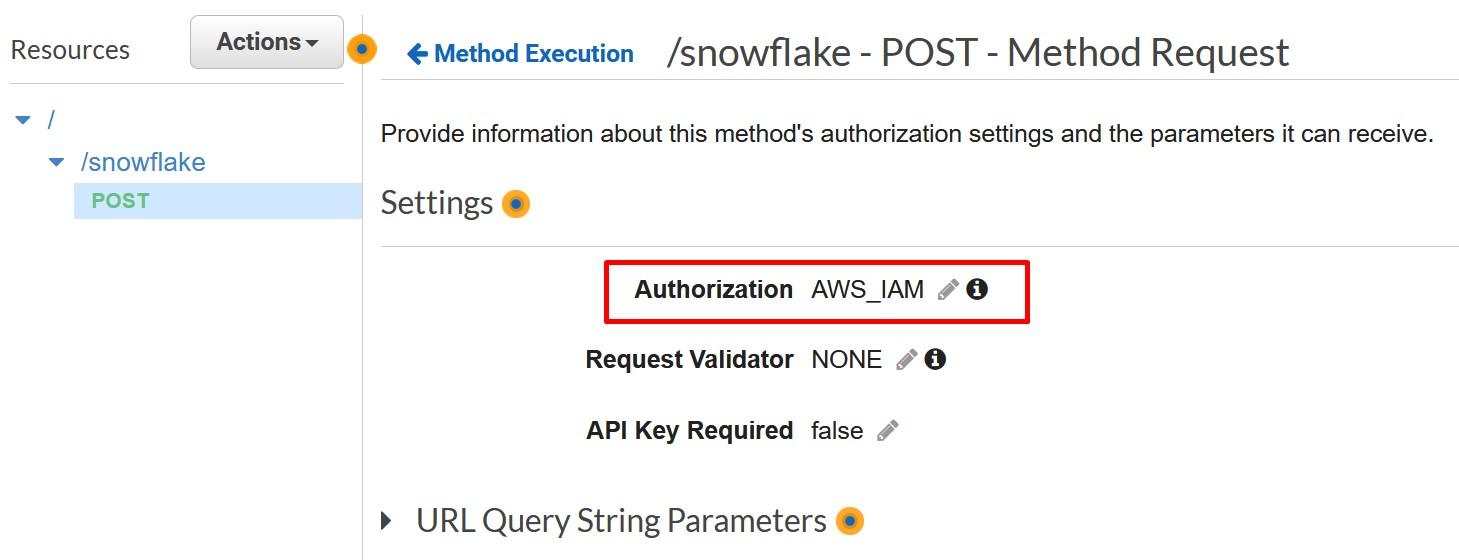
Record the Method Request ARN to the template to be used later on. You can get the value underneath the Method Request.

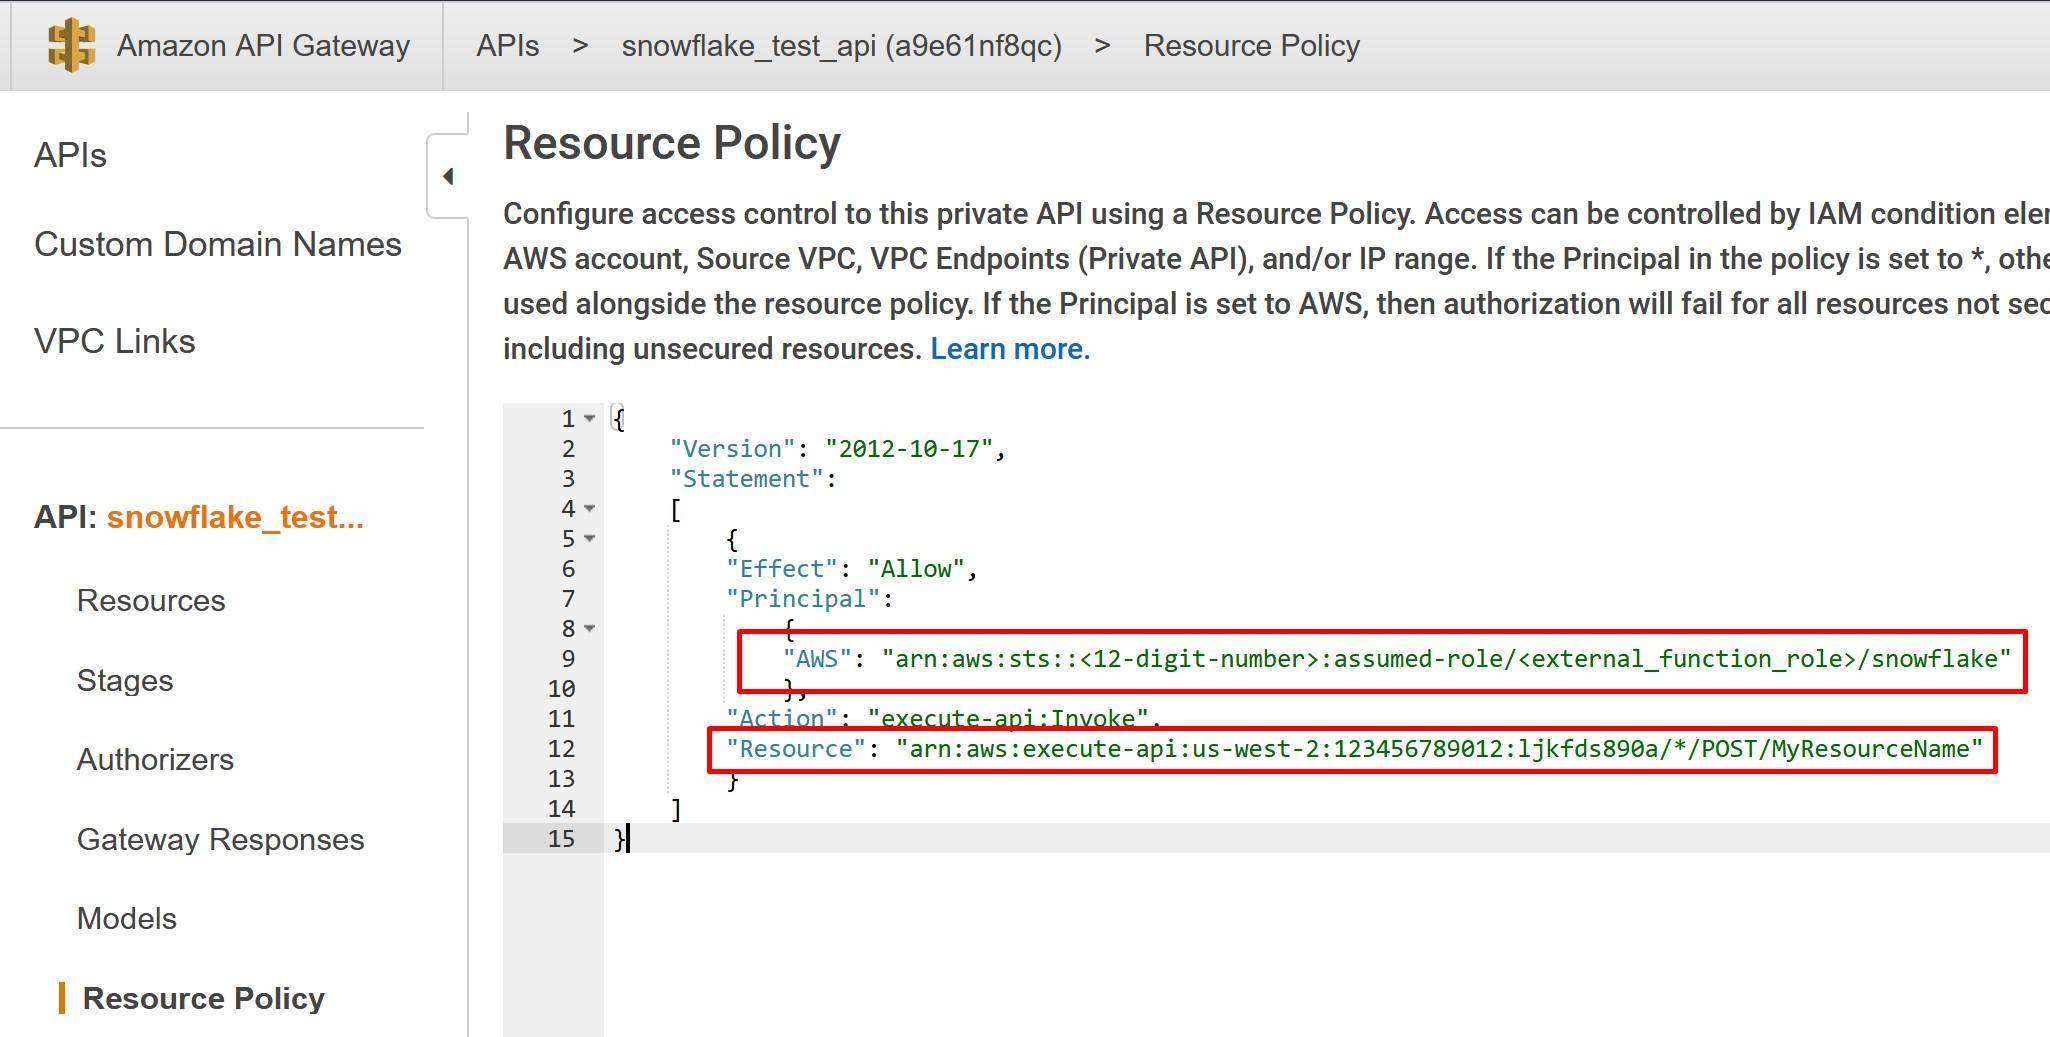
Once done, go to Resource Policy and deploy the following policy from my Github account. You can also copy the policy from the Snowflake -example. In AWS Principal, replace the <12-digit number> and <external_function_role> with your AWS platform id and with IAM role created earlier. In AWS Resource, replace the resource with the Method Request ARN recorded earlier. Save the policy once done and deploy the API again.
Creating an API Integration in Snowflake
Next steps will happen on the Snowflake console, so open up that with your user who has the necessary rights to create the integration.
With necessary rights type in following SQL where <cloud_platform_role_ARN> is the ARN of the IAM role created previously and api_allowed_prefixes is the resource invocation URL.
CREATE OR REPLACE API INTEGRATION snowflake_test_api
api_provider = aws_api_gateway
api_aws_role_arn = ‘<cloud_platform_role_ARN>’
enabled = true
api_allowed_prefixes = (‘https://’)
;
The end result should like something like this

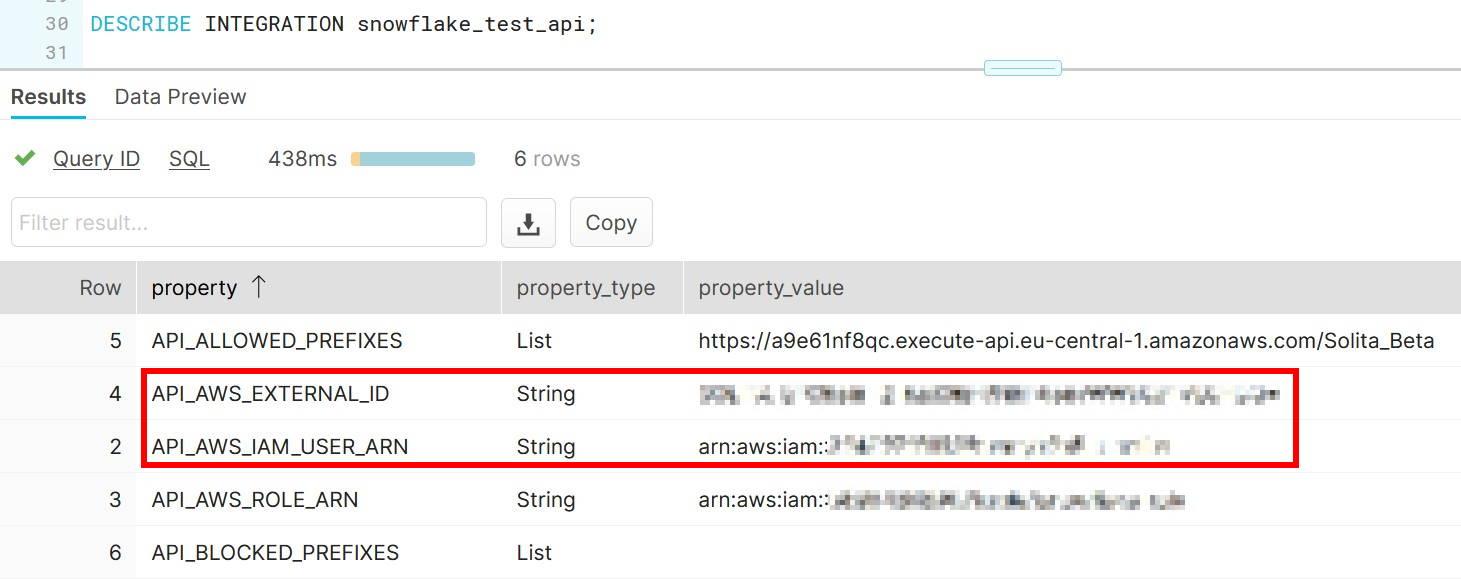
When done, obtain API_AWS_IAM_USER_ARN and API_AWS_EXTERNAL_ID values by describing the API.
Setting up trust between Snowflake and the IAM role
Next steps are done in the AWS console using the values obtained from Snowflake.
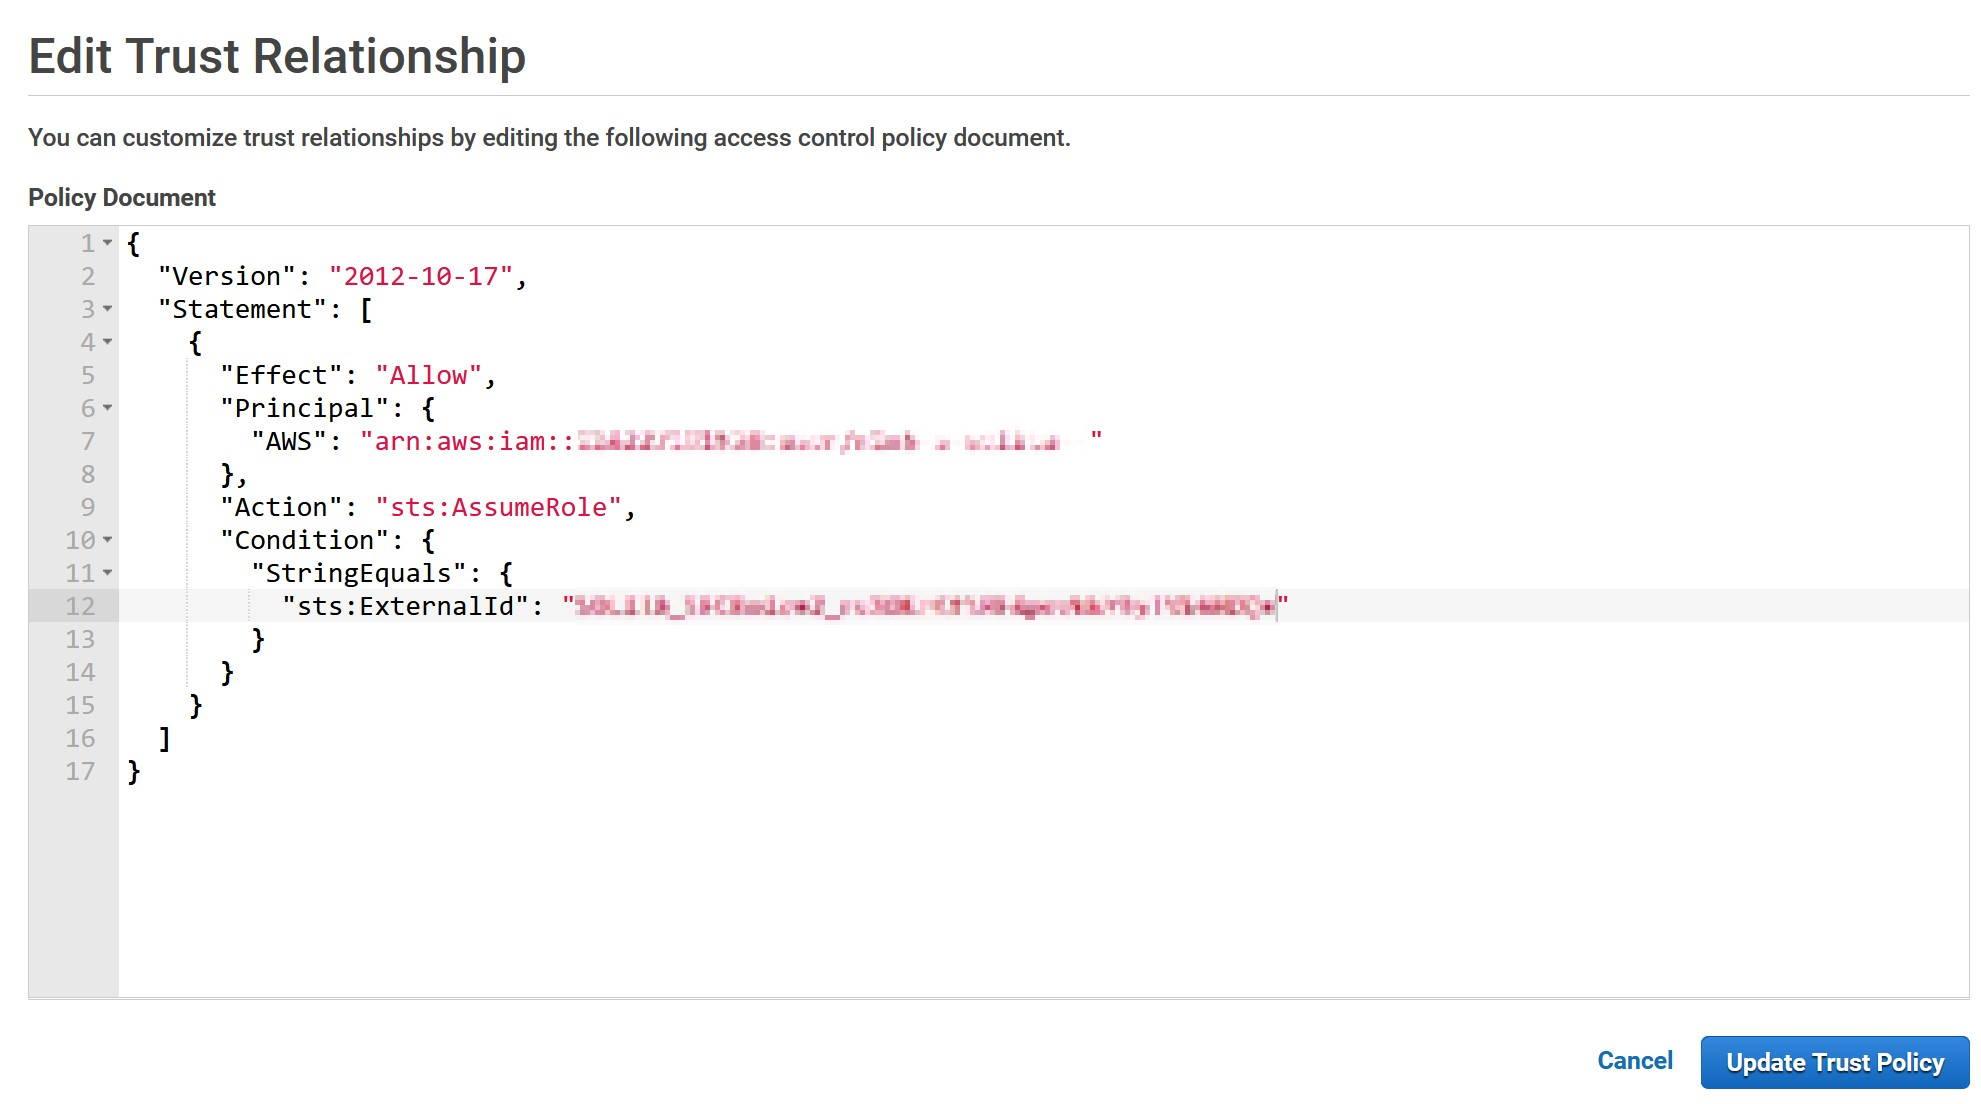
In the IAM console, choose the previously created role and select “Edit trust relationships” from “Trust relationships” -tab.
In Edit Trust Relationships modify the Statement.Principal.AWS field and replace the value (not the key) with the API_AWS_IAM_USER_ARN that you saved earlier.
In the Statement.Condition field Paste “StringEquals”: { “sts:ExternalId”: “xxx” } between curly brackets. Replace the xxx with API_AWS_EXTERNAL_ID. The final result should look something like this.
Update the policy when done and go back to the Snowflake console.
Creating an external function in Snowflake
In Snowflake create the external function as follows. The <api_integration name> is the same we created previously in the Snowflake console. The <invocation_url> is the resource invocation URL saved before. Include also the resource name this time.
CREATE EXTERNAL FUNCTION my_external_function(n INTEGER, v VARCHAR)
RETURNS VARIANT
API_INTEGRATION = <api_integration_name>
AS ‘<invocation_url>’
;
End result should like something like this

Calling the external function
You can now finally that the connection is working, by selecting the function with an integer value and any given string. The output should be as shown in the image. As you can see, this example is really basic and shows only that the connection is working.

If you face in errors during the execution, check the troubleshooting page at Snowflake for possible solutions. I can say from experience that you must follow the instructions really carefully and remember to deploy the API at AWS often to reflect your changes.
This blog post has now covered the basics of external functions e.g. how you can trigger basic Python code running inside AWS Lambda. Next time I will show how you can build something concrete using the same tools and Amazon services.
Are we there yet?
External functions are currently a Preview Feature and are open to all accounts, but they support currently only services behind Amazon AWS API Gateway.