
AWS Glue tutorial with Spark and Python for data developers
In this tutorial you will create an AWS Glue job using Python and Spark. You can read the previous article for a high level Glue introduction.
In the context of this tutorial Glue could be defined as “A managed service to run Spark scripts”.
In some parts of the tutorial I reference to this GitHub code repository.
Create a data source for AWS Glue
Glue can read data either from database or S3 bucket. For this tutorial I created an S3 bucket called glue-blog-tutorial-bucket. You have to come up with another name on your AWS account.
Create two folders from S3 console called read and write.
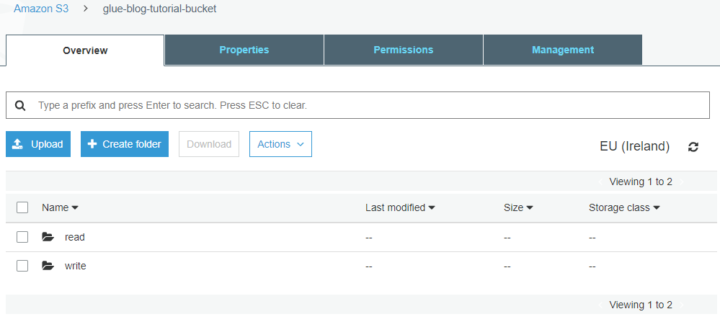
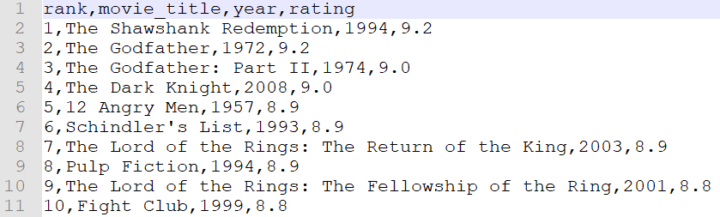
Upload this movie dataset to the read folder of the S3 bucket.
Crawl the data source to the data catalog
Glue has a concept of crawler. A crawler sniffs metadata from the data source such as file format, column names, column data types and row count. The metadata makes it easy for others to find the needed datasets. The Glue catalog enables easy access to the data sources from the data transformation scripts.
The crawler will catalog all files in the specified S3 bucket and prefix. All the files should have the same schema.
In Glue crawler terminology the file format is known as a classifier. The crawler identifies the most common classifiers automatically including CSV, json and parquet. It would be possible to create a custom classifiers where the schema is defined in grok patterns which are close relatives of regular expressions.
Our sample file is in the CSV format and will be recognized automatically.
Instructions to create a Glue crawler:
- In the left panel of the Glue management console click Crawlers.
- Click the blue Add crawler button.
- Give the crawler a name such as glue-blog-tutorial-crawler.
- In Add a data store menu choose S3 and select the bucket you created. Drill down to select the read folder.
- In Choose an IAM role create new. Name the role to for example glue-blog-tutorial-iam-role.
- In Configure the crawler’s output add a database called glue-blog-tutorial-db.
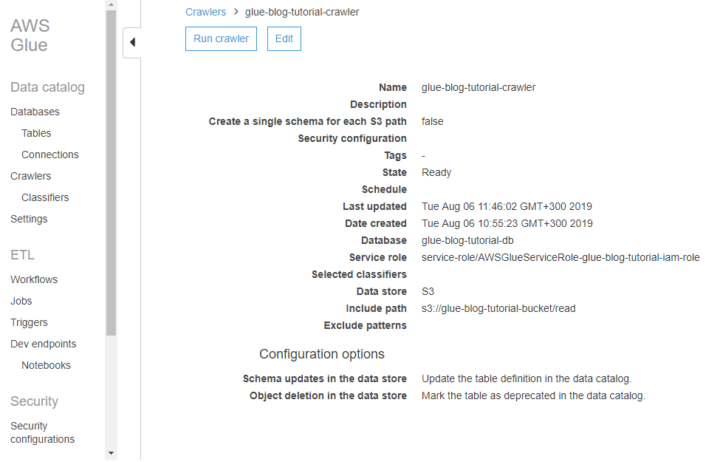
When you are back in the list of all crawlers, tick the crawler that you created. Click Run crawler.
Note: If your CSV data needs to be quoted, read this.
The crawled metadata in Glue tables
Once the data has been crawled, the crawler creates a metadata table from it. You find the results from the Tables section of the Glue console. The database that you created during the crawler setup is just an arbitrary way of grouping the tables.
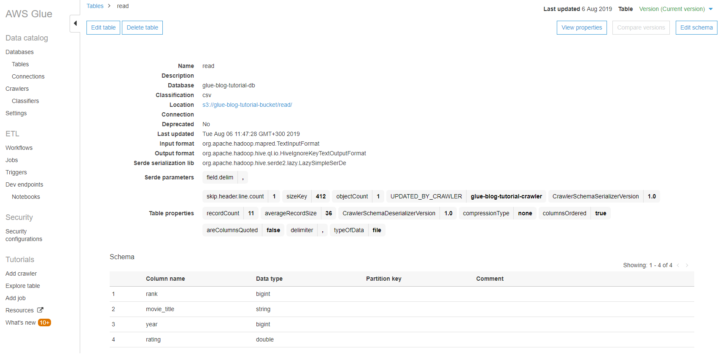
Glue tables don’t contain the data but only the instructions how to access the data.
Note: For large CSV datasets the row count seems to be just an estimation.
AWS Glue jobs for data transformations
From the Glue console left panel go to Jobs and click blue Add job button.
Follow these instructions to create the Glue job:
- Name the job as glue-blog-tutorial-job.
- Choose the same IAM role that you created for the crawler. It can read and write to the S3 bucket.
- Type: Spark.
- Glue version: Spark 2.4, Python 3.
- This job runs: A new script to be authored by you.
- Security configuration, script libraries, and job parameters
- Maximum capacity: 2. This is the minimum and costs about 0.15$ per run.
- Job timeout: 10. Prevents the job to run longer than expected.
- Click Next and then Save job and edit the script.
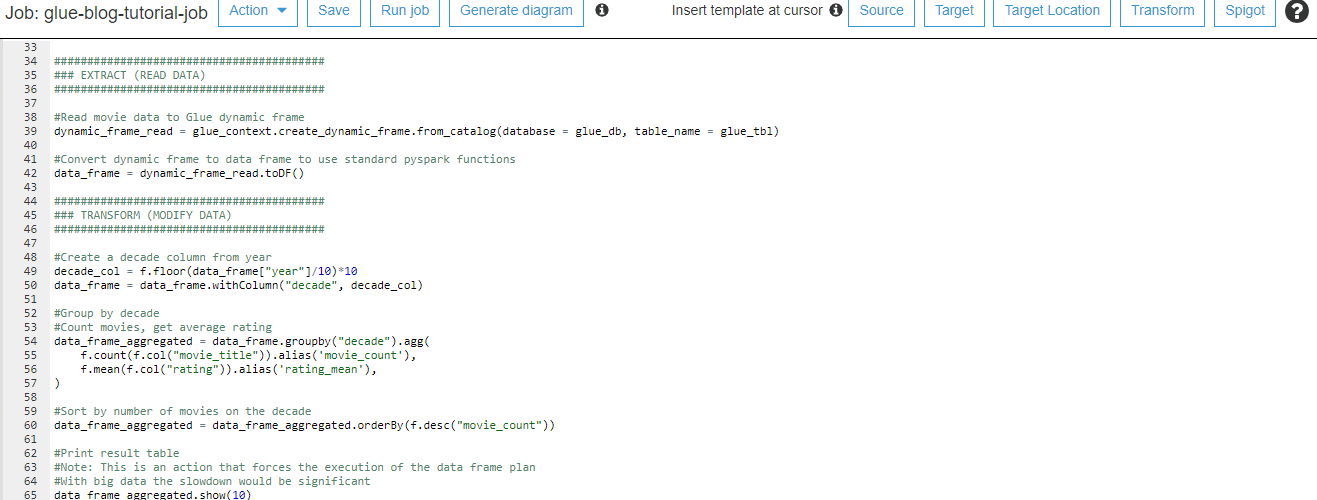
Editing the Glue script to transform the data with Python and Spark
Copy this code from Github to the Glue script editor.
Remember to change the bucket name for the s3_write_path variable.
Save the code in the editor and click Run job.
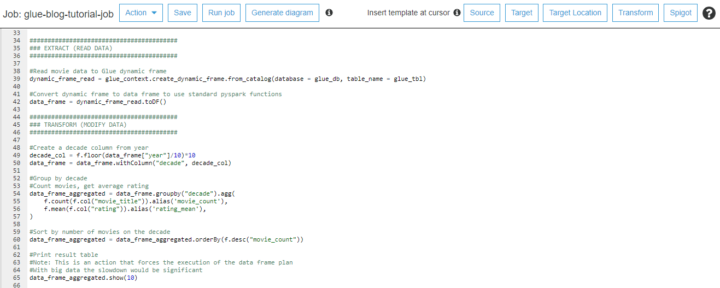
The detailed explanations are commented in the code. Here is the high level description:
- Read the movie data from S3
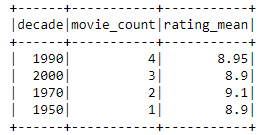
- Get movie count and rating average for each decade
- Write aggregated data back to S3
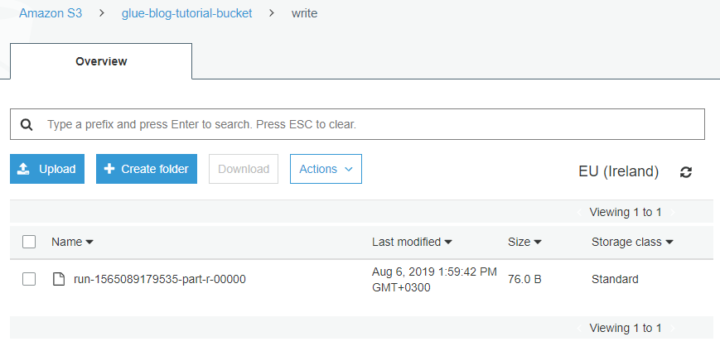
The execution time with 2 Data Processing Units (DPU) was around 40 seconds. Relatively long duration is explained by the start-up overhead.
You can download the result file from the write folder of your S3 bucket. Another way to investigate the job would be to take a look at the CloudWatch logs.
Speeding up Spark development with Glue dev endpoint
Developing Glue transformation scripts is slow, if you just run a job after another. Provisioning the computation cluster takes minutes and you don’t want to wait after each change.
Glue has a dev endpoint functionality where you launch a temporary environment that is constantly available. For development and testing it’s both faster and cheaper.
Dev endpoint provides the processing power, but a notebook server is needed to write your code. Easiest way to get started is to create a new SageMaker notebook by clicking Notebooks under the Dev endpoint in the left panel.
About Glue performance
In the code example we did read the data first to Glue’s DynamicFrame and then converted that to native PySpark DataFrame. This method makes it possible to take advantage of Glue catalog but at the same time use native PySpark functions.
However, our team has noticed Glue performance to be extremely poor when converting from DynamicFrame to DataFrame. This applies especially when you have one large file instead of multiple smaller ones. If the execution time and data reading becomes the bottleneck, consider using native PySpark read function to fetch the data from S3.
Summary about the Glue tutorial with Python and Spark
Getting started with Glue jobs can take some time with all the menus and options. Hopefully this tutorial gave some idea what is the role of database, table, job and crawler.
The focus of this tutorial was in a single script, but Glue also provides tools to manage larger group of jobs. You can schedule jobs with triggers or orchestrate relationships between triggers, jobs and crawlers with workflows.
Learning the Glue console is one thing, but the actual logic lies in the Spark scripts. Tuning the code impacts significantly to the execution performance. That will be the topic of the next blog post.